DIY Adjustable Angle, Free Standing,
Mini Moon and Splash Boards
1.
Low cost due to partial DIY construction
$1,090
2.
Study rigid and reliable
3.
Simple easy setup
Our Product
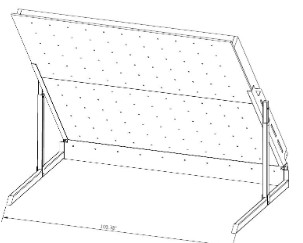
Free Standing
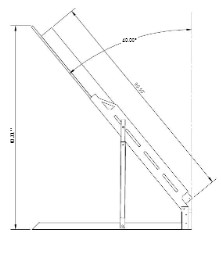
Adjustable Angle
The Angle Board adjusts easily, making every project comfortable and fun. Perfect for all ages!

Fits under an eight foot ceiling
Made in Lafayette Colorado
Core Values
I have an interest in your success. I answer questions promptly and will use these questions to continuously improve the assembly instructions.
Testimonials
I had an exceptional experience working with Victor and couldn’t be more pleased with the MoonBoard frame he built for me. The frame is incredibly solid and adjustable, which has been a huge advantage, especially for safety since my young kids also use it. Victor’s attention to detail is impressive, and he went above and beyond to guide me through the entire construction process.
The frame assembly itself was straightforward, and the final product feels sturdier than many of the professional-grade walls I’ve climbed on at gyms. I also appreciated how responsive Victor was throughout, helping me ensure everything fit perfectly and was built to last. The adjustable angle feature, while manual, is smooth and takes just minutes to change.
Overall, Victor’s frame offers tremendous value, safety, and quality at a very reasonable price point. It’s an ideal solution if you’re looking for something rock-solid for home climbing.
–Kevin Connolly
Hello Victor,
I just wanted to share some pictures of the completed board. The frame is great and it feels solid climbing on it.
Thanks for putting together a great product!
-Chris
“Working with Victor was an absolute pleasure. I had zero construction experience going in, and he walked me through every detail – no question went unanswered. He was incredibly responsive and even took the time to FaceTime with me multiple times to walk through different build steps and make sure I was doing things correctly. His patience and willingness to help turned what felt like an overwhelming project into something genuinely fun and rewarding.
I’ve dreamed of having my own home climbing wall for years, and Victor made that dream not only possible but far easier to achieve than I ever imagined. The finished wall is fantastic – it looks great, feels solid, and adjusts smoothly between angles. I couldn’t be happier with how it turned out, and I’m so grateful for Victor’s help in making it happen. If you’re looking to build a home wall, this is hands down the best way to do it.
– Gabe Ludwig
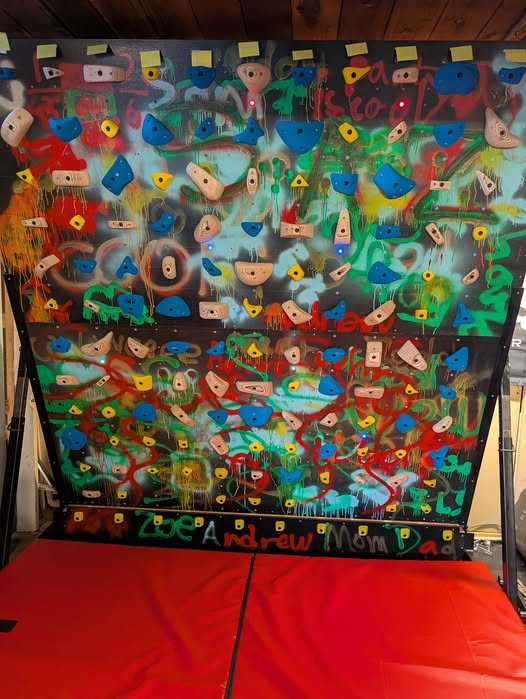
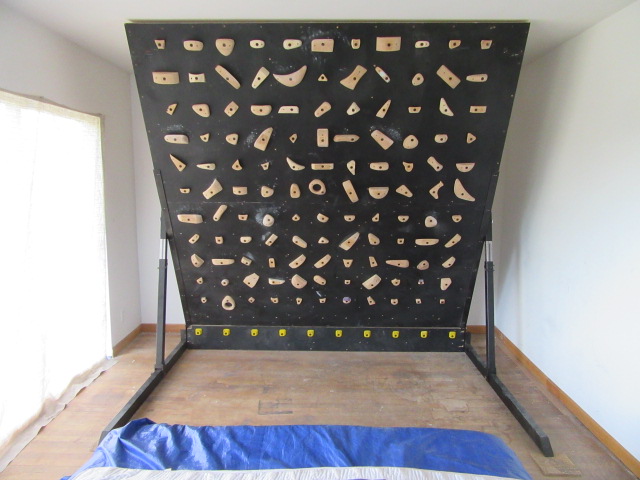
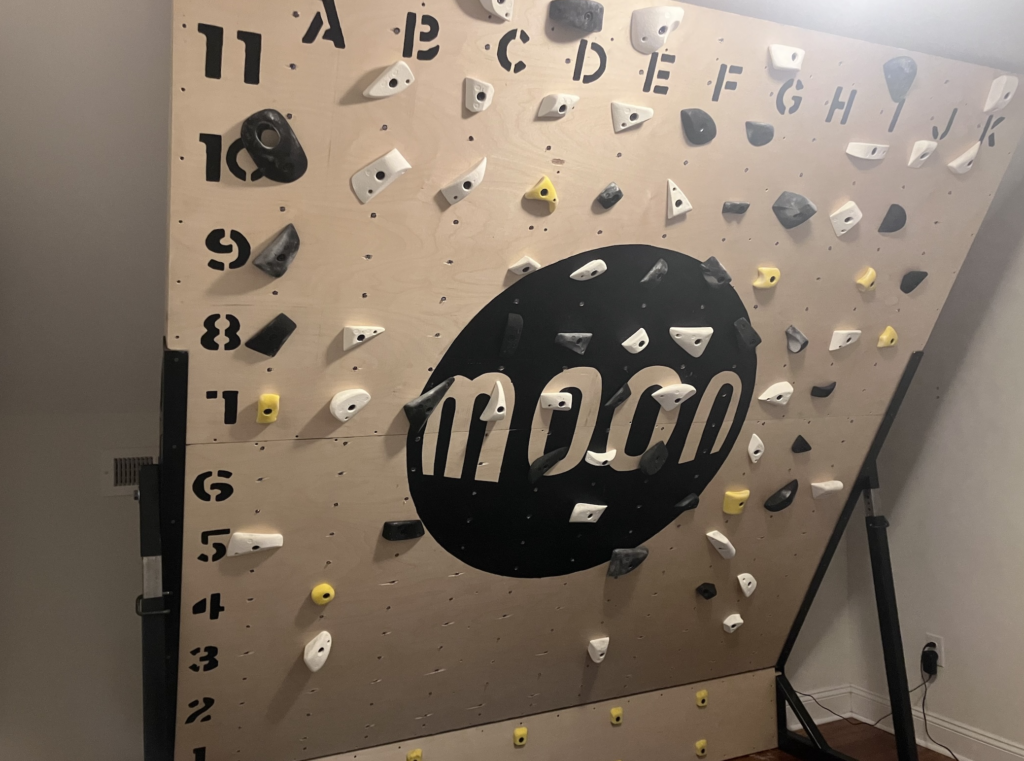
Finished my Mini Moonboard 2025 with a Bluesman Board adjustable angle frame.
I had a few goals:
- I want a system board my children (9, 7, 3) and I can enjoy
- It has to fit under my 8 ft walls
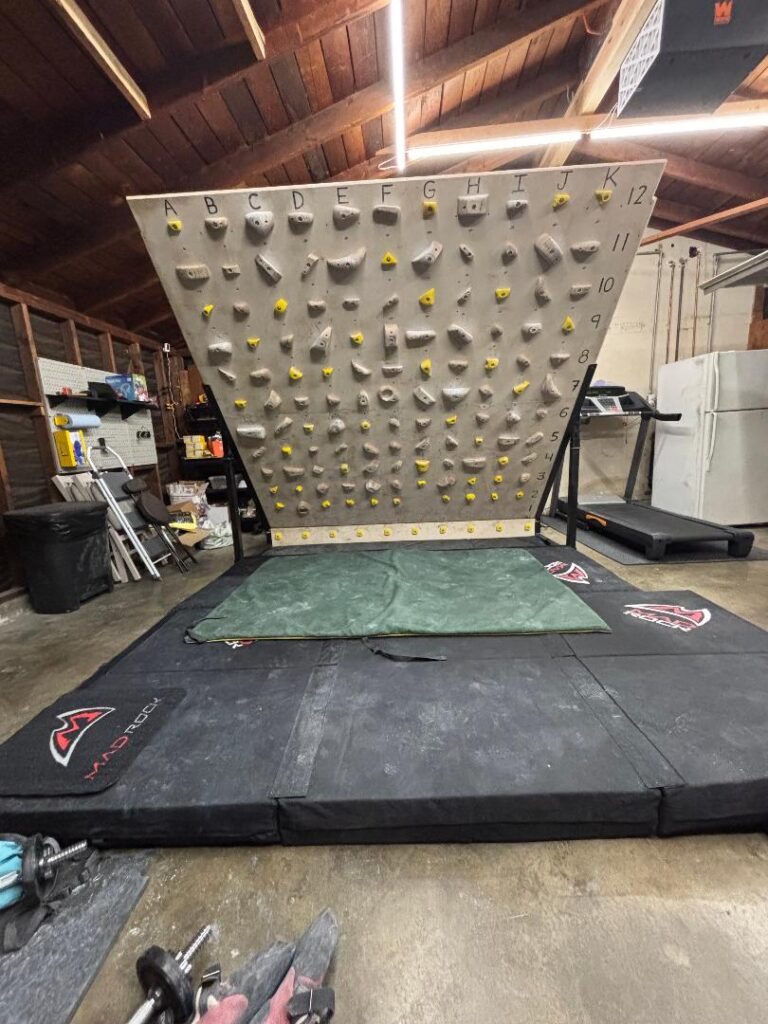
- It must be free standing (no drilling into walls / ground)
I chose the Mini Moonboard because it’s a well established system board that’d fit at 20 degrees in my garage. Other boards like the TB2 would only fit at 40 degrees. I came to the conclusion that even an easy 40 degree board would be too hard for my kids, based on our experiences at a local climbing gym trying both the Kilter (commercial) and TB2.
I chose the Bluesman frame because it is free standing and can adjust from 20 to 40 degrees, the latter being mainly an aspirational goal for myself and hopefully the kids one day. I also liked that it was made of metal for that extra bit of security. After looking through various online DIY templates and factoring in my 0 DIY experience, I came to the conclusion that I trust an adjustable metal frame from someone who has helped many people on this forum far more than I trust myself with various online templates.
I was tempted to get prefab kits (ex: official Mini Moonboard kit) but decided to save a bit of money and attempt a fun (?) DIY project with the kids. This part was a bit of a gamble.
The Build:
My worries were quickly put to rest when I reached out to Victor at Bluesman to request a specialized version of the frame that could go to 20 – 40 degrees (instead of the default 25 – 40). According to my math, that was the lowest possible degree that would still fit under my ceilings, and, I needed every possible degree to make the wall accessible for my kids.
Victor very graciously and proactively scheduled a live call with me to discuss the request and the overall build. I was very clearly in over my head when it came to DIY, but he assured me it was doable and helped answer my various over-analyzed questions. For example, official kit vs from scratch, stud spacing and stability questions, metric vs imperial, etc etc. We exchanged over fifty messages and he was gracious and patient with his time and expertise. He was always down for a call and wanted to be in touch throughout.
The instructions cover not just how to assemble the metal frame, but also how to setup the plywood and wooden structure behind it. Despite the instructions being pretty well documented both in pictures and text on their website, when I initially read it I was horrified. I had no idea what it was saying on my first read through.
Once I had all the parts and tools in hand though the instructions suddenly all made sense. The kids had a blast spray painting the plywood (they did all of this) then we suffered through drilling the hundreds of holes required for the t-nuts and LEDs. This IMO was the most painful part of the overall build. It wasn’t necessarily hard, it just took so long and my back was exhausted afterwards.
Creating the wooden frame (using the supplied instructions) and attaching it to the metal frame was the easier part. I breezed through this mostly on my own, with some help here and there from my young helpers. Even with no DIY experience, it was simple enough for me to cut wood with a handsaw, screw it all together, and bolt it into the metal frame. I could have done this part all on my own, including lifting up the final pieces and bolting them together, though, it is a lot easier with a second adult. My tiny wife jumped in a handful of times to help do things such as flip the framed panel over.
By the time I was done (in a few days alongside my full-time job, far quicker than I mentally planned for), I realized I breezed through it using only the basic instructions, without needing to ask any questions. This was extra surprising to me given how many questions I had before the build. I have no doubt he would have been just as responsive and helpful here too.
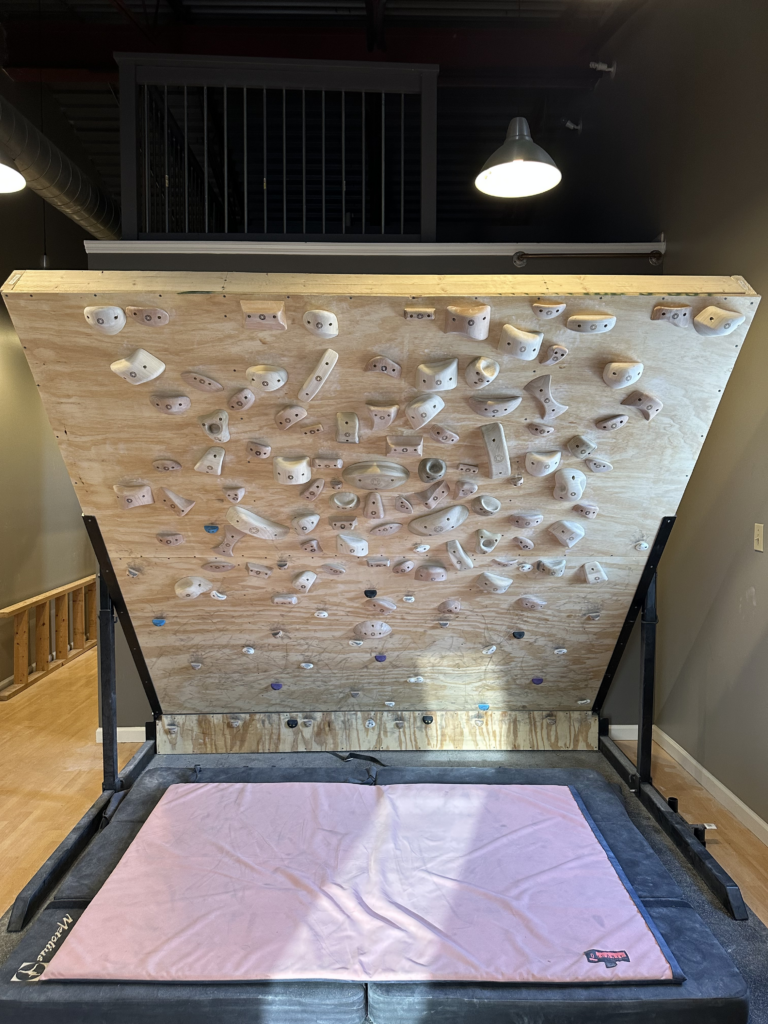
Finally, installing the holds and LEDs was time consuming, but, given the finish line was so close, we breezed through this part as well.
The Verdict:
We’re still in honeymoon phase so take it all with a grain of salt. My kids love it, their friends love it and gravitate towards it, and IMO the difficulty is just right.
Mini Moonboard 2025 at 20 degrees is hard enough that on the first session, my 9 and 7 year old can only reach the top when free climbing using any hold. A few sessions later, they can reach the top on the easiest V3 (lowest level) on the app. Thus so far it’s fun enough to be an achievable challenge, but still have plenty of runway to go to V10s at 40 degrees one day.
The wall is rock solid, I have total confidence in it, and unexpectedly, it’s nice to have metal in the picture when my kids’ friends’ parents are worriedly watching their kids take a shot at the board. The whole experience working with Victor also leaves a nice feeling overall to this memorable family project and hopefully a long-time family “heirloom” type of piece.
Hope this helps inspire other parents to attempt this type of project too. Hopefully it’s the start of many family memories together in the garage!